
Showing posts with label Indian. Show all posts
Showing posts with label Indian. Show all posts
Wednesday, February 23, 2011
Mee Rebus
Mee Rebus which is of Indian origin and a spin off from Indian Rojak. It does not need any introduction to Malaysians or Singaporeans who are not Indian. Ask them about Mee Rebus or Indian Rojak and you get a smile in their faces and a thumb-up - sedap, hojiak and yummy.
Recipe for Mee Rebus is HERE Read More......
Tuesday, July 20, 2010
Pennywort/Pegaga Drink - The Secret Fountain of Youth

Mother Nature has so perfectly planned her pharmacy so that it is is within everyone’s access. It is there to nourish and supply us with abundant energy, as well as nurture us when we have some illness, we need only to become aware of its use for us

Read about it's medical benefits from factOdiz bite-sized knowledge

Ingredients
2 handfuls pennywort, with stems pinched off
200ml boiling water
180g sugar or honey to taste
Method:

Add all the ingredients to a blender along with 5 or 6 ice cubes and water(as concentrated as you'd like), blend at high speed.
Then using a fine-mesh colander, strain out the leafy sludge. Taste and add syrup/honey or water if necessary.
Serve poured over ice.
Store the remainder in the fridge.
Enjoy!

Friday, March 26, 2010
Nasi Biryani


Ingredients:
1 1/2 lbs chicken pieces
1 1/3 lb basmati rice - soaked for 30 minutes and drained
1 tbsp tamarind pulp - soaked in 1 cup water for 30 minutes, Then press and sieve the juice.
2 - 3 medium onion - sliced(about 1/2 lb)
2 tbsp grated ginger
2 tbsp chopped garlic
1 cup cooking oil
1 packet 'Shan' Malay Chicken Biryani
Rasins
Fried shallots
Toasted cashew nuts
Cilantro for garnishing
Method:
Marinate chicken pieces with ginger, garlic and 2 tbsp of Shan Malay Chicken Biryani mix for 1 hour.
Heat oil and brown the marinated chicken pieces. Remove and set aside.
Sweat the chopped onions, then add in browned chicken pieces, the rest of the Shan Malay Chicken Biryani mix, tamarind juice and 1 cup water. Continue to cook and stir until sauce is thickened. Set aside.
Boil 10 cups of water with 1 tbsp salt and add in the soaked rice. Boil until the rice is three-quarter tender. Drain the liquid.
Assembling the Biryani:
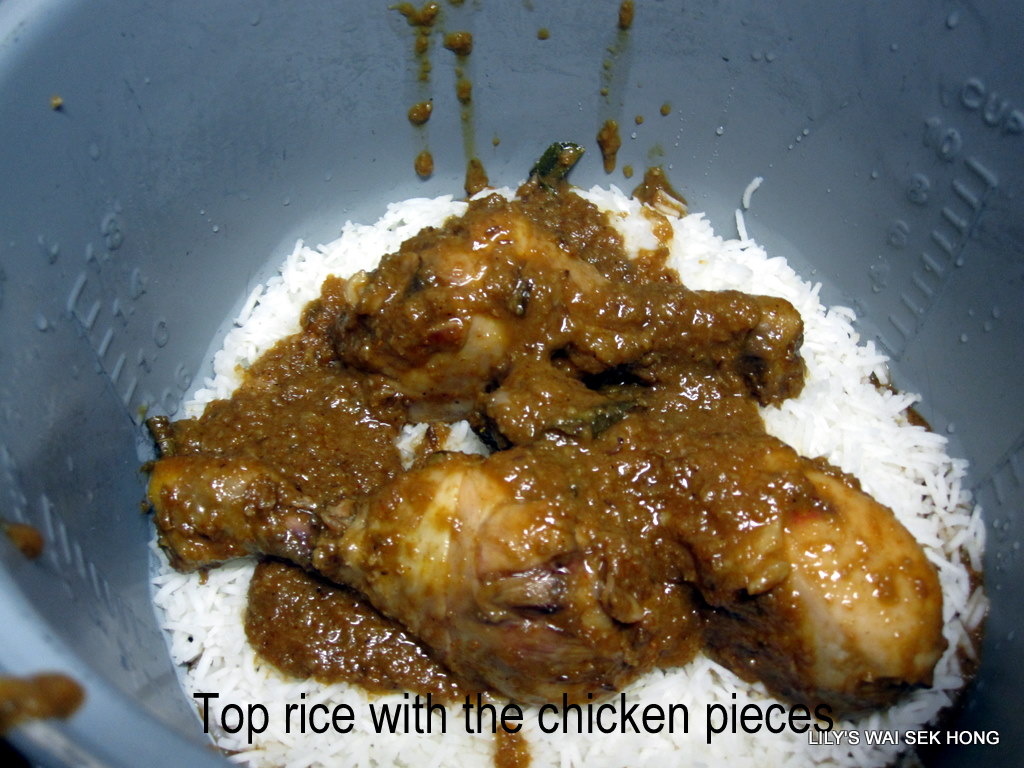
Spread the cooked chicken pieces and the drained rice in layers into the rice cooker.
Top with raisins, then cover and press the cook function and cook until rice is cooked through.
Slightly mix the rice and chicken pieces and garnish with cashew nuts and fried shallots before serving.


Read More......
Monday, June 01, 2009
Putu Mayam/String Hoppers


BEFORE

AFTER
Putu Mayam is one of my favorites when i was a child which is a long long time ago. During that time, hawkers come to your doorstep, they will promptly be at your street, the same time everyday, some on bicycles, push carts and some on foot. Recalling some of these friendly hawkers who had become friends from our frequent beckonings, bring fond memories especially the Kacang Putih man, who will call me LULU. The Kacang Putih man and the Putu Mayam man were Indian, so, i have always assoicated Putu Mayam as an Indian Cuisine and indeed it is - a Sri Lankan Delight. I only realised that this light and satisfying snack was called 'String Hoppers" when i was able to read.
Making Putu Mayam was fun while it la sted, my arm muscles had improved from all the pressing - the texture of the dough had to be just right to fasilitate easy flow of noodles.
Putu Mayam has to be fluffy and dry, the strands of noodles, be the fineness ever and to achieved this, one has to have the proper size template to be used in a 'muruku mould'. I made a template out of a plastic jar cover and pricked very tiny holes in it. My first batch of Putu Mayam turned out to be thick beehoon and loh see fun, luckily the template worked and i succeeded making a batch of Putu Mayam to satisfy me.


Ingredients:
2 cups rice flour
Method:
Line basket for steaming with a clean napkin, put in the dry rice flour, steam for about 1 hour.
Put the rice flour and tapioca starch in a bowl. Pour boiling water, add salt all at once onto the flour, stirring with the handle of a wooden spoon until the flour is moistened. When cool enough, gather it together with the hand and ensure there are no pockets of dry flour by kneading lightly.

Serves
Read More......

AFTER
Putu Mayam is one of my favorites when i was a child which is a long long time ago. During that time, hawkers come to your doorstep, they will promptly be at your street, the same time everyday, some on bicycles, push carts and some on foot. Recalling some of these friendly hawkers who had become friends from our frequent beckonings, bring fond memories especially the Kacang Putih man, who will call me LULU. The Kacang Putih man and the Putu Mayam man were Indian, so, i have always assoicated Putu Mayam as an Indian Cuisine and indeed it is - a Sri Lankan Delight. I only realised that this light and satisfying snack was called 'String Hoppers" when i was able to read.
Making Putu Mayam was fun while it la
 sted, my arm muscles had improved from all the pressing - the texture of the dough had to be just right to fasilitate easy flow of noodles.
 Putu Mayam has to be fluffy and dry, the strands of noodles, be the fineness ever and to achieved this, one has to have the proper size template to be used in a 'muruku mould'. I made a template out of a plastic jar cover and pricked very tiny holes in it. My first batch of Putu Mayam turned out to be thick beehoon and loh see fun, luckily the template worked and i succeeded making a batch of Putu Mayam to satisfy me.

Ingredients:
2 cups rice flour
2 tbsp tapioca starch
550 ml boiling water
1-2 tsp salt
1 cup grated coconut - white only - steam with 1/4 tsp salt
1/2 cup dark brown sugar
550 ml boiling water
1-2 tsp salt
1 cup grated coconut - white only - steam with 1/4 tsp salt
1/2 cup dark brown sugar
Parchment papers - perforated to make steam holes
A Muruku Press with a very fine template/Putu Mayam Press
Method:
Line basket for steaming with a clean napkin, put in the dry rice flour, steam for about 1 hour.
Put the rice flour and tapioca starch in a bowl. Pour boiling water, add salt all at once onto the flour, stirring with the handle of a wooden spoon until the flour is moistened. When cool enough, gather it together with the hand and ensure there are no pockets of dry flour by kneading lightly.
Fill Muruku/Putu Mayam Press with enough dough, squeeze dough through the fine holes in the Press at the same time moving the Press over each parchment paper, so that the fine strings fall in two circles.
Repeat making noodles and when done, put the noodles to steam over fast boiling water for 5 - 8 minutes or until noodles are cooked and translucent.
Remove from steamer, allow to cool slightly, then gently peel the putu mayam off the parchment paper away.
Serve with steamed coconut and brown sugar.
Enjoy

Serves
Subscribe to:
Posts (Atom)