Foodie

Tuesday, March 30, 2010

Tee nyah kuih

 This 'kuih' is typically 'hokkien' and it is time that i talk about my heritage as hokkien 'lang' after being branded as a 'macau sai' by my paternal grandmother cos me and my siblings do not speak our 'mother tongue' that well or rather not at all. We spoke our Mother's tongue, cantonese, but it should not be our Mother's tongue but my Grandma's - Ah Po, who is cantonese. There was once when i was asked by my Ah Ma to tell this hokkien guy who came to look for my Ah Kong - 'ie kee liao pee la lui lee eh au pit'  - hokkien guy seemed to understand what i said, while i myself took a long time to figure out what i said.  Can any of my 'hokkian lang' readers tell me what i said?. 

This kuih is a speciality and will appear on the table of hokkien families during hokkien festivals.  My one and only Ah Koh, made the best tee nyah kuih and i would like my Ah Ma and Ah Koh to be proud of me by making this kuih although mine is not as good.


Ingredients:

1 lb rice flour
2 tbsps tapioca flour
1/2 tsp borax/ pang sar (optional)
2 tbsps potassium carbonate & sodium bi-carbonate solution
2000 ml/2 liters water
1 ½ tbsps cooking oil
1 tsp salt


Method:

Combine rice flour, tapioca flour, borax, potassium carbonate & sodium bi-carbonate solution, salt together in a microwave-safe bowl. . Add in the water, a little at a time, to prevent lumps. Give it a good mix before adding cooking oil and stir well and make sure borax is  dissolved.

Cook in the microwave until a very thick consistency, stirring after every intervals.
Pour in a greased 9 inches round steaming tray and spoon the 2 tablespoons of tap water over surface of kuih.

Steam kuih over rapidly boiling water for one hour.  Replenish water if necessary.  To prevent condensation, wrap steamer cover with a large piece of cloth(using a bamboo steamer is the best).

Test for doneness with a wooden skewer(lidi) pierced in the centre,  It should come out clean.

Cool kuih for a couple of hours before slicing.

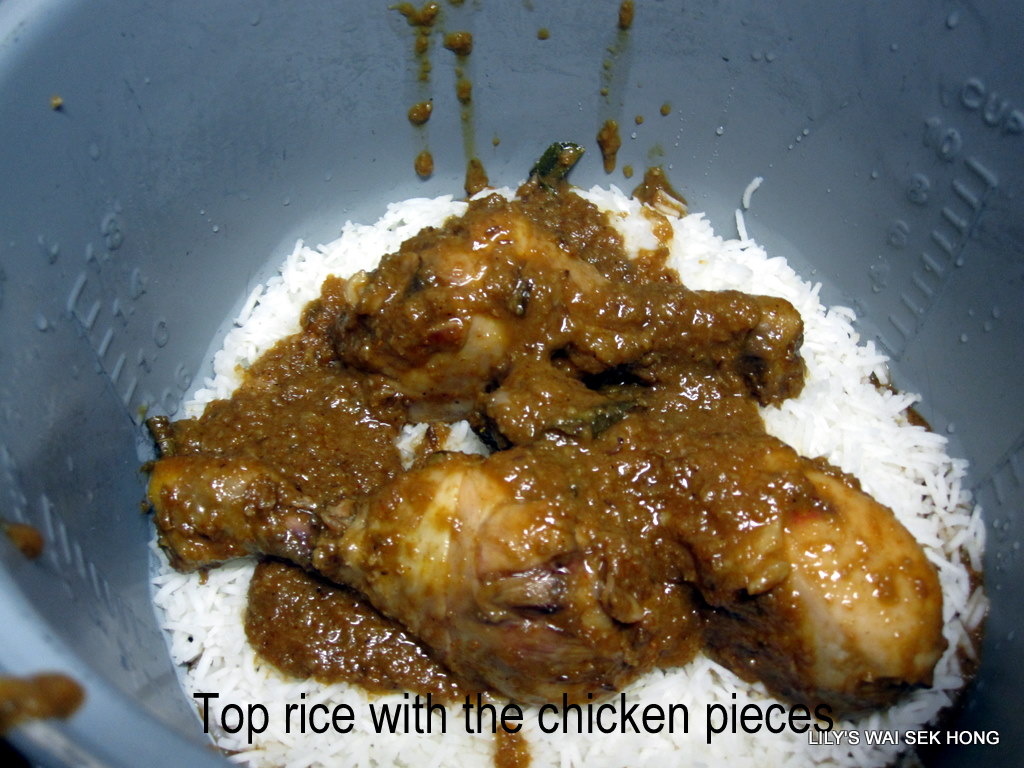
Serve with Hong Bak or Red Cooked Pork or Tau Yue Bak


Serves
Read More......

Sunday, March 28, 2010

Gingery Chilli Sauce

How can anyone eat Hainanese Chicken Rice without the Gingery Chilli Sauce?!! You are missing one of the essences of eating Chicken Rice.  The most important part of a successful and delicious chicken rice meal, is not on the chicken or the rice, but the chili sauce. The chili sauce has a fresh taste of ginger, chili, garlic and calamansi juice  which gives a flavorful “kick”to the meal.  I am very particular about the ingredients used - ginger : it has to be young ginger, ginger which are like my age will not do.  Chillies have to be fresh red and a few fresh  red Chilly padi.  Calamansi juice is a must but sometimes, like the hokkien saying goes - Boh hu hae pun ho - if fish is not available, shrimp will do, then lime juice will be ok.  The proportion of ingredients do not have to be specific - if you like it more gingery, use more ginger and likewise.


Ingredients:

Fresh red chillies
Fresh red chilly padi
Young ginger
Garlic
Calamansi juice/lime juice
Salt and sugar to taste

Method:

Seed the fresh red chillies.

Remove the skin off the young ginger and garlic.

Put all the ingredients except the calamansi/lime juice, in the food processor and process until it becomes a paste.

Remove into a microwave-safe bowl and microwave on high for 1 minute.

Add in salt and sugar and let it cool, then add in calamansi/lime juice.

Pour into a sterilized jar/bottle and keep in the fridge.

Before serving, a little rendered chicken fat and sesame oil can be added.

Serves
Read More......

Friday, March 26, 2010

Nasi Biryani

I have cooked nasi biryani many times and somehow, this chinese lady is not getting it right.  My nasi biryani did not have the indian or malay umph and more often than not, the rice was not totally cooked through according the method provided in most recipes, and i have to resolve by using the microwave to finish the cooking.  But, nowadays, cooking nasi biryani is no more a problem, thanks to Vivien Tan, one of my readers who have become a dear friend, send me a few packets of 'SHAN"  brand for  biryani .  I followed the instructions on the back of the packet and my biryani rice have always been cooked through and the nasi was spicy, with all the umphs.  I find the taste to be slightly too salty so i reduced the amount of salt recommended to 1 tablespoon, when i was cooking the rice.  Thank you Vivien for sending me the Shan premixed, they are available now here in our indian stores.


Ingredients:

1 1/2 lbs chicken pieces
1 1/3 lb basmati rice - soaked for 30 minutes and drained
1 tbsp tamarind pulp - soaked in 1 cup water for 30 minutes, Then press and sieve the juice.
2 - 3 medium onion - sliced(about 1/2 lb)
2 tbsp grated ginger
2 tbsp chopped garlic
1 cup cooking oil
1 packet 'Shan' Malay Chicken Biryani
Rasins
Fried shallots
Toasted cashew nuts
Cilantro for garnishing

Method:


Marinate chicken pieces with ginger, garlic and 2 tbsp of Shan Malay Chicken Biryani mix for 1 hour.

Heat oil and brown the marinated chicken pieces. Remove and set aside.

Sweat the chopped onions, then add in browned chicken pieces,  the rest of the Shan Malay Chicken Biryani mix, tamarind juice and 1 cup water.  Continue to cook and stir until sauce is thickened. Set aside.

Boil 10 cups of water with 1 tbsp salt and add in the soaked rice.  Boil until the rice is three-quarter tender.  Drain the liquid.

Assembling the Biryani:

Spread the cooked chicken pieces and the drained rice in layers into the rice cooker.

Top with raisins, then cover and press the cook function and cook until rice is cooked through.

Slightly mix the rice and chicken pieces and garnish with cashew nuts and fried shallots before serving.


Serves
Read More......

Thursday, March 25, 2010

Biscotti

This recipe is from Jacques Torres's book - Dessert Circus.  According to Jacques Torres, biscotti is traditionally an italian cookie which is baked two times to produce a hard cookie that they like to dip in sweet wine.  He has adapted the recipe so these cookies are not quite so hard and also cut the baking time in half.  He used cold butter so he can roll and bake them right away.  These fragrant, flavorful cookes are great by themselves or dunked in coffee and since Jacques Torres is from Provence, he prefers to dip his in 'pastis'.  Me, having lived in Malaysia,  will have mine with 'Kopi-O'.


Ingredients:

3/4 cup/4 ozs/100 gm whole unblanched almonds
1/3 cup/1.6 ozs/50 gm whole pistachios
7 tbsp/3.5 ozs/100 gm Cold unsalted butter, cubed
3/4 cup/5.25 ozs/150 gm granulated sugar
2 cups/8.8 ozs/250 gm all purpose flour
1 tbsp/0.3 oz/8 gm Anise seeds
1 tsp/0.2 oz/6 gm baking powder
Grated zest of 1 lemon
Pinch of salt
2 large eggs

For the egg wash

1 large egg white, beaten

Method:

Preheat the oven to 300 f(150 c). 

Spread the almonds and postachios evenly on a bking sheet and place in the oven,

Toast for about 30 minutes, until they are golden brown.

You will be able to smell the n uts when they are ready.

A good test is to break a nut in half and check to see if it is light brown on the inside.

Toasting the nuts brings out their natural flavor.

Remove them from the oven and allow to cool completely on the baking sheet on wire rack.
Place the remaining ingredients in a large mixing bowl and beat with an electric mixere on medium speed until well combined, abvout 5 minutes, the mixture will hold together in a soft dough.

Add the colled toasted nuts and mix until they are evenly incorporated, about 1 minute.  If you are using hand-held mixer, you may want to knead in the nuts by hand to avoid buring out the motor of the mixeer.

Remove the dough from the mixing bowl and place on a very lightly floured work surface.  If the dough is stickly and hard to work with, it is too soft.  To fix this. flatten it into a disk, cover with plastic wrap, and place it in the refrigerator for  a minumum of 1 hour.(When the butter in the dough gets cold, the dough will stiffin).  Remove from the regrigerator and proceed.

Preheat the oven to 350 f(175c).

Divide the dough into three equal pieces.  Use the palms of your hands to roll each piece on the lightly floured work surface into a rope 1 - 1 1/2 inches in diameter.  Each rope should be even and fit on your bking sheet lengthwise.  If the dough sticks to your hands or to the work surface as you are rolling it, dust it lightly with flour.

Roll firmly to remove any trapped air bubbles (At this stage, you can wrap the dough well in plastic wrap and freeze for up to two weeks.  Bring it back to room temperature before baking.)

Place two of the piscotti ropes on a parchment paper-covered baking sheet.  You will only have room for two because they spread as they bake.  With a pastry brush, lightly brush each rope with the egg white; this will add shine to the4 baked biscotti.

Bake until golden brown, about 30 minutes. 

Remove from the oven and let cool slightly on the baking sheet.

Use a serrated knife to slice the biscotti on a diagonal into 1/2 inch thick cookies.  If you do this while the biscotti are still warm, they not crumble.  The biscotti will harden as they cool.  If they are still soft when you slice them, place the slices on a bking sheet and bake at 300f(150c) for another 10 - 15 minutes.  Repeat the baking and cooling procedure with the remaining biscotti rope.

Store in an airtight container at room temperature for two or three weeks.

Variation: 

Dip the biscotti halfway on a diagonal into tempered bittersweet chocolate.  Wipe the excess chocolate from the tip and place the bniscotti on a sheet or parchment paper to allow the chocolate to set.

Serves
Read More......

Wednesday, March 24, 2010

Easy Cupcake

It's Mother Nature's form of March Madness in Colorado! Heavy snow fell overnight, leaving more than a foot of heavy snow.  I am glad it was not yesterday, cos i had to make and bring these cupcakes to Renee's school, so that her classmates can have them during recess.   A double-dose of lemon extract and lemon juice-- in the cake and in the buttercream frosting -- gives these cupcakes great lemony taste and just the right amount of sweetness -- and they were more than irresistible. 


Ingredients:

2 cups self rising flour or 2 cups bleached all-purpose with 2 tsp baking powder
1 1/4 cup fine granulated sugar
1 teaspoon salt
1/2 cup butter/shortening(very soft but not melted, Crisco is best)
3/4 cup water with 1 tbsp lemon juice(any juice of your choice)
2 large eggs
1/2 tsp lemon extract(pair with the juice of your choice)

Method:

1 Set oven to 350 degrees F.

2 In a large bowl, mix together the flour with sugar and salt until combined.

3 Add in the butter/shortening , beat on medium speed of an electric mixer until all the flour/sugar are coated.

4.Add in eggs and lemon extract to the juice and beat lightly.

5.Add liquid and beat until well combined and blended, scraping the bowl constantly. (the batter will be thick, if desired you may add in a few more tablespoons juice).

6. Pour into paper-lined regular size muffin tins filling under just three-quarters full or half full.

7.Bake for 20-22 minutes or until the cupcakes test done (do not overbake as they will be dry).

8.Immediately remove from pans.

9.Cool completely before frosting.

Buttercream:

1/2 cup (1 stick) butter or margarine softened
1/2 tsp lemon extract
2 cups sifted confectioners' sugar (approximately 1/2 lb.)
1  tablespoons milk

Makes: About 1 1/2 cups of icing.


Method:

In large bowl, cream butter/shortening with electric mixer.

Add lemon extract..

Gradually add sifted sugar, one cup at a time, beating well on medium speed. Scrape sides and bottom of bowl often.

When all sugar has been mixed in, icing will appear dry. Add milk and beat at medium speed until light and fluffy.

Keep bowl covered with a damp cloth until ready to use.

For best results, keep icing bowl in refrigerator when not in use.

Refrigerated in an airtight container, this icing can be stored 2 weeks. Rewhip before using.

For thin (spreading) consistency icing, add 1 tablespoons light corn syrup, water or milk.


Serves Read More......

Tuesday, March 23, 2010

Renee's 8th Birthday Cake

Today is Renee's 8th Birthday and i am still busy although her birthday party for her friends was on Saturday last weekend, i have to make cupcakes for her class, now and the sooner i get this posting done, the faster i can get started with the cupcakes.  There were so much prep for her Birthday Cake, her theme was Art and Craft and she wanted so many impossibles which i am not capable of.  I had just wanted to make the figure 8 and put in sweet girly things.  In the end, we compromised, i had my figure 8 and she had her paint palate, with paint brushes, paints etc.  HAPPY BIRTHDAY RENEE.


Ingredients:

2 x 8 inch cake of choice
Buttercream
Modelling paste - 1/3 cup water
                            2 tsp powdered gelatin
                            3 tsp glucose/corn syrup
                             4 cups confectioner's sugar
 -

Method:

Put water into a small saucepan, sprinkle the gelatine on to the water.

Heat gently until the gelatine dissolves, do not allow to boil. 

Remove from heat, stir in the glucose /corn syrup and allow to cool.

Place confectioner's sugar into a bowl.  Gradually pour in the liquid, mixing till the paste forms a plastercine-like consistency.

Turn out onto a a clean board dusted with a little cornstarch and knead till smooth.
To make different colours, divide the dough and tint each piece with food coloring, kneading well with the colours you wish to use.


Serves
Read More......

Wednesday, March 17, 2010

Layered pau

Another pau which is layered but not as much as the Thousand Layers Cake, this one has only 4 layers of pau and 3 fillings.  The color of the filling is so vibrant as it has so many egg yolks and the custard powder bring it to another level.  Try making this, it is not as tedious but just as or rather more delicious.


Ingredients:

Filling:

6 egg yolks
1 cup dessicated coconut
7 tbsp sugar
3 tbsp rice flour
3 tbsp custard powder
3/4 cup milk

Dough:
1 1/2 cups all-purpose flour
1 tsp yeast
1/2 tsp baking powder
2 tbsp sugar
1/4 tsp salt
1/2 cup milk
1 tbsp oil
Topping:

Wofberries/goji/kee chee(optional)

Method:

Mix filling ingredients together in a microwave-safe bowl and cook on high one minute at a time stir well after every minute, until mixture has thickened(it was thickened in 3 minutes in my 900 watts microwave, so if you are having a higher wattage microwave oven, you could use 3/4 power or stop at 2 minutes).  Divide into 3 equal portions.

To make the dough:

Knead dough. let dough rise until it is double in bulk.

Divide dough  into 4 portions.

Roll out each portion of dough into 7 inch square (Roll the first portion and if it resists, let it rest and roll the second, repeat rolling and resting for all 4 portions)

Spray or grease a 7 inch cake pan with non stick butter spray and line with parchment paper.

Place  on piece of rolled portion on the bottom and spread a portion of the filling on top, level filling with an off-set spatula.

Top filling portion with another piece of rolled dough, press down to release trapped air. 

Repeat with filling and topping with another piece of rolled dough, ending with a piece of rolled dough on top.
Press wofberries/goiji/kee chee on top in a pattern.

Brush top of dough with oil to prevent drying out.

Let it rest for 30 - 45 minutes and in the meantime, bring the water in a steamer to the boil.

When dough has rested and risen, put into steamer and steam on high heat for 35 minutes until a skewer comes out clean when pricked into the middle of cake.

Let cake cool before cutting into bite-size portions and serve warm.


Serves
Read More......

Monday, March 15, 2010

Steamed Thousand Layer Cake

.Steamed Thousand Layer Cake,  I cannot decide on the name for this, should it be a cake or pau?  Although the ingredients for the dough is the same for 'pau' and assembled into a huge 'pau', it needed to be cut into bite-size pieces for serving, so i think i will call it a cake. The traditional filling is usually with coconut and dates but i have tweaked the filling to pork floss and hope that Renee will eat this cake as she does not like coconut at all..  She loves anything made with yeast and loves to smell the pau and bread before she eats them.


Ingredients:

3 1/2 cup  all purpose flour
2 tsp instant yeast
1 1/4 cup or more water

Filling:

1/2  cup Sugar
1/2 cup Lard /shortening/margarine
1 cup pork floss


Place flour, yeast and water in the food processor and pulse until a dough forms.

Remove and knead until dough is soft and smooth.

Cover with a wet cloth and let rise until double in bulk.

Remove the dough to a pastry board.

Then roll until very thin, about 30 inches long and 12 inches wide.

Spread some lard and sprinkle sugar
Divide dough into 3 portions
Sprinkle sugar on to the center third only


Spread pork floss all over the center third and sprinkle more sugar

Fold the right third over the center third

Brush with melted margarine/oil

Sprinkle on sugar

Spread pork floss and then more sugar and fold the left third over

Roll dough out to 18 inch x 12 inch and divide into thirds.  Repeat brushing, sprinkling of sugar and pork floss and sugar again

Repeat folding the right third and the brushing, sprinkling and folding the left third over

Roll dough out to 18 inch x 12 inch, then fold 3 inches in on both sides of the 18 inch edge to make a 12 inch piece of dough.  Fold the dough in half and then half again to make a 6 inch square.

Perforate an 8 inch piece of parchment and put into steaming rack

Place the 6 inch square dough on top of parchment paper and leave to proof  for 30 minutes  In the meantime, bring water to the boil and steam cake for 45 minutes.  Cool cake before slicing.

Read More......
Related Posts Plugin for WordPress, Blogger...