Foodie

Friday, April 27, 2007

Soft Pretzel

Renee is a picky eater and this is one thing that she will eat. It makes my day when she eats and i don't care if it takes the whole day to make it. It is worth the while. The best recipes are recipes that come with the manual of the kitchen appliances and this one is from automatic breadmaker.

Photo Sharing and Video Hosting at Photobucket

Ingredients:

1 1/4 cups water 80 f/27 c
1 egg yolk room temperature
1 tbsp oil
2 tbsp sugar
1 tsp salt
1/8 tsp white pepper
3 1/2 cups bread flour
1 tbsp instant yeast

Glaze
1 egg white
1 tbsp water

Toppings(optional)

kosher salt and sesame seeds

Method:
Choose the program for pretzels in the breadmachine and turn on 'start' and wait for program to end.

To do it manually or with cake mixer, knead all the ingredients until soft and elastic. Cover and leave to rise until double.

On a lightly floured surface, cut dough into pieces - 8 or 16 pieces.

Roll each 16 pieces into 16 inch rope and 8 pieces to 24 inch rope. (Roll a piece until it does not stretch anymore, let it rest. Repeat rolling with the rest of the pieces and then come back to the first rope and so forth until the desired length )

Cross the ends of the rope to make a loop(i pick up the left end with my right hand and right end with the left hand). Twist the crossed ends once and fold across the loop.

Place on a greased baking sheet 1 1/2 inches apart.

Brush with glaze and sprinkle with topping.

Let rise until double in size, about 30 minutes.

Bake at preheated 375 f/190 c for 15 - 20 minutes or until done.

Optional: i like to drizzle with melted butter as soon as it is out of the oven.

Variation

Pepperoni Pretzels:

Add 1 cup sliced pepperoni and 2 tablespoons Parmesan cheese to dough ingredients.

Follow above method to complete.

Serves

Read More......

Tuesday, April 24, 2007

Fatt Koh/Huat Kuih

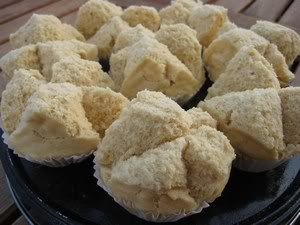
Again another one of those that have failed attempts after attempts. I just don't know why i bother to make this as i personally do not like to eat it. Is it because that i can't make it smile when everyone is making smiling fatt koh and that keeps in search of????????. I think i have found the correct steamer that is making the fatt koh smile and it is the spaghetti pot.

Photo Sharing and Video Hosting at Photobucket Photo Sharing and Video Hosting at Photobucket

Ingredients:

250 gm self rising flour
140 gm chinese peen thong/gula melaka/gula kabung
100 ml water
150 gm very thick coconut milk(by weight)
a pinch of salt

Method:

Chop up the sugar into small pieces and add 100 ml water.

Cook in the microwave or stovetop until sugar melts. Sieve and let it cool.

Add all the ingredients in the cake mixer and using the whisk, whisk until thick and smooth.

Heat the spaghetti pot with 2 inches of water and bring to high boil with the cups on the steamer to heat them before pouring in the batter which should be 90% full. Cover lid tightly and steam for 15 minutes. The kuih should smile if the right amount of batter, time for steaming and maintaining high heat are observed.

Notes

The ones made with gula melaka are very fragrant while the ones with peen thong are very plain but not floury though.


Serves
Read More......

Thursday, April 19, 2007

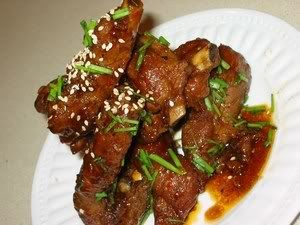
Chin Kiang Pork Ribs

This dish is named after the black vinegar which is distilled in Chin Kiang , Jiangsu Province in China and the meaning of the name is "Garrison (of the Yangzi) River" These ribs are traditionally braised for 45 minutes but using the pressure cooker, it only takes 10 minutes.

Photo Sharing and Video Hosting at Photobucket

Ingredients:

2 lbs pork ribs(chopped into bite size)
1/2 cup of chinese celery(cut into 1 inch lengthwise)
1/2 big onion(wedged)
1 pcs of bay leaves

Gravy:

1 1/2 cups water
4 tbsp sugar
4 tbsp chin kiang vinegar
1 tbsp light soya suace
1 tbsp worcestershire sauce
1/2 tsp A1 sauce
1 tbsp tomato sauce
1 star anise.

Thickening:

1 tbsp cornflour
2 tbsp water

Method:

Heat oil and brown the pork ribs. Leave aside.

Place the pork ribs and rest of the ingredients and gravy into the pressure cooker. Cover and bring pressure to high. Lower the heat to the lowest but maintain the high pressure. Cook for 10 minutes.

Release pressure immediately and remove cover.

Cook gravy until it thickens slightly, then further thicken with cornflour solution.

Dish out and serve.

Serves
Read More......

Nutty Crisps

These crisps are addictive and i have to thank Lee Ping for sharing this recipe. She has step by step pictures and it is here http://hipfood.wordpress.com/. I made the original using almond flakes and then another batch with cashews, therefore, i have named them Nutty Crisps. This is one of those recipes which is easy and have the least of ingredients and i think it is healthy too as only egg whites are used. This is one way to use up the egg whites accumulated from making cookies which required egg yolks only.

Photo Sharing and Video Hosting at Photobucket Photo Sharing and Video Hosting at Photobucket Photo Sharing and Video Hosting at Photobucket

Ingredients:

1 1/2 - 2 cups nuts - almond flakes/cashews etc
3 egg whites or 6 tbsp egg whites
1/3 - 1/2 cups fine granulated sugar
1/4 tsp salt
1/4 tsp almond essence/butter oil
2 tbsp oil
1/4 cup flour

Method:

Spread the nuts on to the baking sheet.

Turn on the oven to 350F convection to preheat and put the baking sheet with the nuts to roast.(you are roasting the nuts starting with cold oven/0 degree f )

Turn on timer to 10 mins for almond flakes and 15 minutes to cashews(time differs with different oven, so check the nuts at 5 minutes interval for doneness)

Line a silicone sheet on another baking sheet and put in all the ingredients. Mix thoroughly and spread out as thinly as possible. (If silicone baking sheet is not available, line the baking sheet with aluminium foil and grease the foil lightly)

Put to bake for 16 minutes and the crisps should brown at the sides. Turn off oven and leave the crisps to brown. Check the oven every 5 minutes, crisps should be totally brown and crisp in 10 - 15 minutes.

Remove crisps from oven and leave to cool. Once it has been cooled, it can be broken up at random and enjoy.


i have changed the name of this recipe as it has been hijacked by some chinese blog

Serves
Read More......

Chee Cheong Fun II

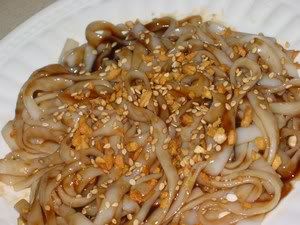
I think i have opened Pandora Box on Borax. I too am afraid to use it and like how the malaysians will say - What to do? When you have the urge to eat a plate, I will cook some dried Vietnamese Rice Stick Hu Tieu and eat with sweet sauce. It is almost like the real fresh thing except that the size of the Hu Tieu is so much thinner. And again another saying in hokkien ' Bo Hu Hae Too Ho'

Photo Sharing and Video Hosting at Photobucket Photo Sharing and Video Hosting at Photobucket

Ingredients:

a packet of vietnamese rice stick Hu Tieu

Garlic oil
Sweet Sauce (recipe is in Chee Cheong Fun)
Fried Shallots or garlic
Roasted Sesame seeds

Method:

Cook the rice stick according to the instructions on the back of packet. Rince in cold water and drain dry.

To serve:

Top a plate of cold hu tieu with garlic oil, sweet sauce, fried shallots and roasted sesame seeds.

Enjoy

Serves
Read More......

Saturday, April 14, 2007

Chee Cheong Fun

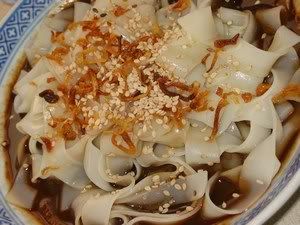
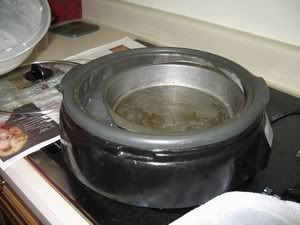
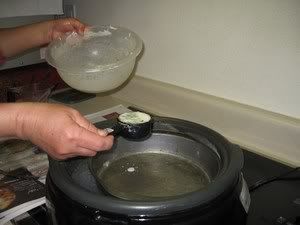
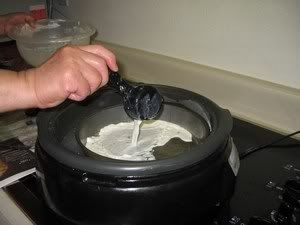
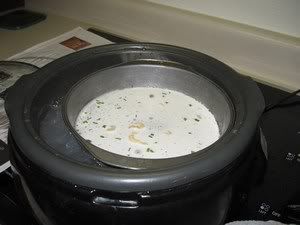
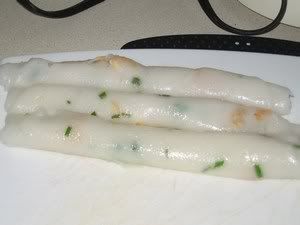
Chee Cheong Fun is one of my most favorite breakfast and it has been a mighty frustrated task for me as i could not get the right texture that i like. I liked the type that is sold for breakfast in Petaling Jaya and it is not the commercial rolled ones that is selling with fish balls etc. This is flat and has a speckle of dried shrimps and green onions. The sauce is diluted 'teem cheong' which used to be dark red but now has been replaced by a brown sweet sauce. I have been looking for the recipe for more than half of my lifetime. Recipes after recipes, my poor daugther has to eat the yurky results. Some recipes do turn out alright but the method of making them is not worth it. My conclusion is that it is not the recipe, I have been barking up the wrong tree, it is the method and of course an undesirable ingredient - Borax. It can be omitted, but it makes the sheets glozzier, more elastic, and less sticky and this is the texture that I like. The desirable method is to have the pan floating on top of boiling water and so a skillet with a tight fitting lid that can accommodate the pan and still allow room for steam to circulate is required.

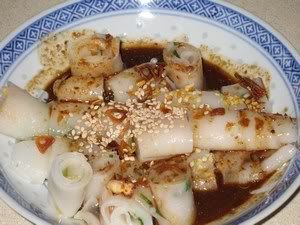
Photo Sharing and Video Hosting at Photobucket With sweet sauce, garlic oil, fried onions and sesame seeds

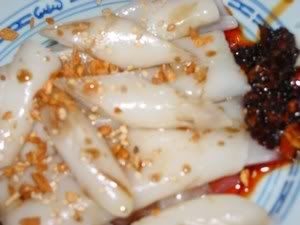
Photo Sharing and Video Hosting at Photobucket With X O Sauce, Chilly Sauce, Garlic oil, Fried onions & sesame seeds

Photo Sharing and Video Hosting at Photobucket With sambal Hae Bee, Garlic oil, soya sauce, fried onions and sesame seeds

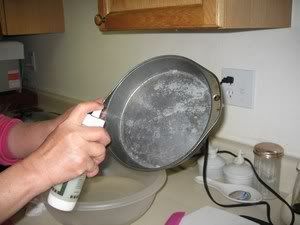
Photo Sharing and Video Hosting at Photobucket Spray pan with vegetable oil. I use 2 eight inch pans.

Photo Sharing and Video Hosting at Photobucket Heat oiled pan

Photo Sharing and Video Hosting at Photobucket Measure 1/4 cup of batter

Photo Sharing and Video Hosting at Photobucket Pour into pan

Photo Sharing and Video Hosting at Photobucket Swirl and tilt pan around to level batter, cover and steam until cooked.

Photo Sharing and Video Hosting at Photobucket Remove from steamer, leave pan in cold water bath for 2 minutes. Then using a spatula, loosen the sides and roll it up

Photo Sharing and Video Hosting at Photobucket Cheong fun is ready

Ingredients:

3/4 cup of rice flour
1 tbsp of tapioca flour
1/4 tsp salt
1/4 tsp borax powder (pangsah)
1 tbsp oil
3/4 cup of cold water
1/2 cup of hot boiling water
1 tbsp of chopped spring onions
2 tbsp of chopped dried shrimps (presoak dried shrimps in hot water to soften)


Method:

Spray 2 eight inch pan with vegetable oil.

Pour water 3/4 inch deep into a skillet.

Make a cold water bath by filling a second large pan with 1 inch of cold water.

In a medium bowl, combine the rice flour, tapioca flour, salt, borax powder and oil. Add 3/4 cup cold water and stir until smooth.

Stir in the hot boiling water and chopped spring onions.

Bring the water in the skillet to a boil, then reduce the heat so it is barely bubbling.

Float the oiled pan on the water to heat it through.

Give the batter a quick stir and ladle 1/4 cup of the batter into the pan and a sprinkle of chopped dried shrimps, tilting the pan to spread the batter evenly.

Cover and steam for 3 - 4 minutes, or until the sheet has cooked through.

Transfer the pan to the cold water bath for 2 minutes.

Use a flat spatula to loosen the sheet along one edge, then roll it up loosely.

Transfer the roll to a plate.

Repeat with the remaining batter, cleaning and oiling the pan each time, and replenishing the simmering water in the skillet as necessary.

To serve, cut the roll into 1 inch slices and top with sauces of your choice.

Sweet Sauce


2 tbsp grounded teem cheong/tau cheong/mein see
2 heaped tbsp creamy peanut butter
1/2 tsp garlic powder
1 tsp onion powder
1 tbsp soya sauce
1/2 tsp dark soya sauce
1/4 - 1/2 cup sugar
2 cups water

In a big microwavable bowl, combine the grounded teem cheong, peanut butter, garlic & onion powder, soya sauce and dark soya sauce. Mix them well by adding a little water at a time. Finally add in all the water.

Cook on high in the microwave for 2 minutes. Stir and add in 1/4 cup sugar, Stir well and continue to cook for another 2 minutes until all the sugar has dissolved.

Adjust taste by adding more sugar and if the teem cheong is not so salty, a dash of salt should be added to bring out the sweetness.

Cook further for 1 minute and sauce is ready. It will taste better if you serve the sauce while it is warm as the chee cheong fun has to be at room temperature.

Note:

This chee cheong fun has to be eaten as soon as it is made.

I made a batch earlier and left them cover in the warm water that was left behind after the steaming, thinking that it will be still warm when i serve later. When i wanted to serve them, they were all cracked and not presentable at all.
Read More......

Friday, April 06, 2007

Eight Treasure Rice

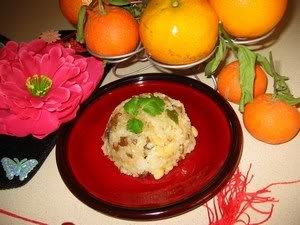
This is the celebrated eight-treasure rice eaten at Chinese New Year. In the early days of the Han dynasty (202 BC-AD 220), rice was considered a delicacy as millet was the staple grain. Eight-treasure rice depicts the almost spiritual significance of rice to the Chinese people, bringing good fortune and blessings to all at the beginning of a New Year. So, i cooked this dish for my friends who came to my New Year's Eve Potluck, hoping and wishing that they will have good fortune and blessings for the new year.


Photo Sharing and Video Hosting at Photobucket

Ingredients:

2 cups long-grain white rice
3 cups glutinous rice
10 cups water
3 tablespoons peanut oil
6 Chinese dried mushrooms, soaked 20 minutes in warm water, squeezed dry, stemmed, caps finely diced
2 dried Chinese sausages (lup cheong), diced
1 boneless chicken thigh, diced
1 tablespoon dried shrimp, soaked 20 minutes in warm water, drained
1/2 can lotus seeds(From a can of boiled lotus seeds)
1/2 cup diced onion
1/2 cup diced bamboo shoots
2 tablespoons light soy sauce
1/2 teaspoon five spice powder
2 teaspoons sesame oil
1 teaspoon salt
2 scallions, chopped

Method:

Combine the rice and wash 3 times.

Heat the peanut oil in a wok until almost smoking. Stir-fry dried shrimp until fragrant, remove and set aside. Fry the Chinese sausages until fragrant, remove and set aside. Fry the diced chicken until brown and then add the mushrooms, onion, and bamboo shoots for 1-2 minutes. Add the soy sauce, five spice powder, sesame oil, and salt. Stir-fry to mix well, lastly add in the lotus seeds.

Cook the rice in the rice cooker with 10 cups of water and when it is done, add the stir-fried ingredients, mixing them through the rice. Cover and leave on warm for 10 minutes. Turn off the heat, and allow to stand for 10 minutes.

TO SERVE:

Stir the rice with chopsticks, adding the chopped scallions. Remove the rice from the pot and pack into a lightly oiled bowl, pressing in firmly.

(If preparing a day in advance, refrigerate in the bowl until just before needed.)

Steam the rice in the bowl for 10 minutes, and invert to serve.


Serves

Read More......

Renee's Fifth Birthday Cake

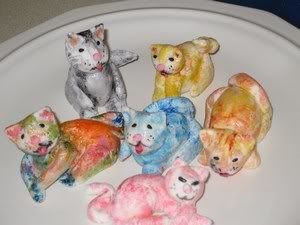
Renee turned five on 23rd March, 2007 but this little girl has tall orders. She wants all her favorites on top of her birthday cake. She wanted Dora, Boots, Strawberry Shortcake, Lightning McQueen and all her Kittens. So, i told her that i will try. Tried to make Dora with sugarpaste but it was not as easy as i thought it would. So, decided to go store hunting for all her requested figurines. Found most of them except the Kittens so i had to continue making them with sugarpaste and ended with 6 - approved by Renee.

Photo Sharing and Video Hosting at PhotobucketPhoto Sharing and Video Hosting at PhotobucketPhoto Sharing and Video Hosting at PhotobucketPhoto Sharing and Video Hosting at PhotobucketPhoto Sharing and Video Hosting at Photobucket

The Birthday Cake is the same strawberry cake iced with the never fail buttercream.

Recipe can be found here http://lilyng2000.blogspot.com/2006/03/renees-birthday-cakes.html

Sugarpaste/Fondant - Refer to http://whatscookingamerica.net/PegW/Fondant.htm


Read More......

Roast Belly Pork III

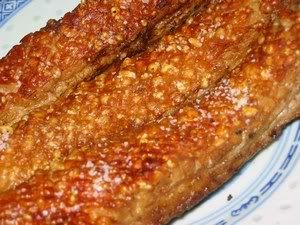
Although i am satisfied with the crackling in Roast Pork II, I had to try out a different way besides poking the skin. I had marinated 5 pieces of belly pork and it had been in the fridge to dry out since last night. i started the grill and scored the skin of one piece with a very sharp knife, like how you would score the diamond cut on the squid(see the first picture). I put the scored piece and the plain one for grilling. After 15 minutes of grilling with both top and bottom fire, i found that the scored piece had already started to crackled, while the plain one was just soft enough for poking. So, i started poking the softened skin with the craving fork and then returned it to the grill. This time with the top grill only for another 15 minutes. The scored piece was already crackling from the edges and looking good while the poked piece had no reaction at all. Turned on the grill for another 15 minutes and then only the poked piece was starting to crackle slightly while the scored piece is almost done crackling all over the skin. I sprinkled salt on to the skin 5 minutes before the time is up. The poked piece had to go another 2 rounds of 15 minutes before it totally crackled. To prove that scoring was the way to go, i scored the other 3 pieces and grilled the same way as the above and they were perfect(second picture). So, the conclusion to perfect crackling is SCORING THE SKIN and have the belly pork in 2 inches strips rather than one whole big piece.

Photo Sharing and Video Hosting at Photobucket Photo Sharing and Video Hosting at Photobucket


Method:

Prepare the belly pork strips like in Belly Pork I and II. (http://lilyng2000.blogspot.com/2005/10/roast-belly-pork.html & http://lilyng2000.blogspot.com/2006/05/roast-belly-pork-ii.html )

Score the skin after blanching in vinegar bath and sprinkle with salt(the salt might pull out some moisture) ( I found that it was hard to score after drying in the fridge , that's why i am recommending to score before drying).

Leave uncovered in the fridge to dry out for at least 12 - 24 hours.

Grill until skin crackles.

Cool before cutting in bite size for serving.


Serves
Read More......
Related Posts Plugin for WordPress, Blogger...