Foodie

Wednesday, March 29, 2006

Yau Char Kway aka Yau Tiew

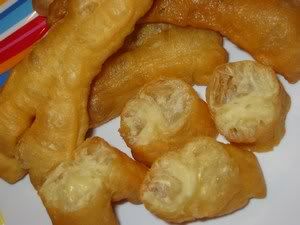
At long last i have finally managed to make a decent yau char kway, thanks to my dear friend blogger, tt. With lengthy discussion on the liquid and other ingredients, i have come to understand that the flour needed much more liquid than stated in the recipe. I have made so many recipes, following them to the tee, and failure. My friend Lena, said - lily, you are not make to be a yck lady. forget about it. All the failures happened because of where i am residing. Being a mile high above sea level and no humidity, baking and cooking have to be fine tuned and adjusted accordingly. In this case, the flour here is extra dry and needed more liquid. tt's recipe only needed 180 ml but i needed 240 ml to make it the right consistency. There are not many ingredients but alot of practise is needed to form uniform yck as the dough is so sticky and soft.

Image hosting by Photobucket

Ingredients:

290g all purpose flour
or
260 g bread flour and 30 g wheat starch

1/2 level tsp ammonia

1 tsp salt (level or heaped; doesn’t matter)

1 1/4 level tsp double acting baking powder-

180g water(enough water to make a sticky dough, in my case, i used 240 ml(1 cup))

Method:

Mix together flour and baking powder.

Dissolve ammonia and salt in water and pour this mixture into the flour.

Knead with your hands to get a sticky but smooth dough. The dough should be wet and sticky (sticks to hands and bowl). Rest dough for 10 - 15 minutes(the longer the fluffier yck)

Wash hands, get out a frying pan or wok, add oil and heat on high (do this while dough is resting,)

Divide dough into 2 portions.

Dust hands and dough with flour.

Roll dough into a rectangle (length and width depends on the size of your frying utensil) by now the dough should be like bread dough. Dough should be about 1/4 inch thick. Cut with a pizza cutter 3/4 inch wide strips. Using a bamboo skewer, dip in water and swipe onto the bottom strip. Top with another strip, and press down lightly with skewer. Let these strips rest. (see notes)

Check to make sure oil temperature is 380’F. Take a piece of yck, stretch it and drop into the oil.

Leave it along until it floats, it should float within 10 seconds. Once it floats, use chopsticks (one in each hand - this i am not able to do) to constantly turn the yck as it expands (it should reach its maximum expansion within 30 seconds). After it has expands as much as it could, continue to fry it turning every 10 seconds or so until it is golden brown (another 3-5 mins.).


Notes from tt:

After shaping the ycks, the longer you let it rest the puffier it will get when they are fried (you can fry right away if you’re in hurry).

Notes from lily:

When yck is ready for frying, move pastry board with the strips of yck as near to the frying utensil as possible so that it goes into the oil without stretching too much.

Since i fry the yck one at a time, i will fry them until they reached the maximum expansion. When all the strips are done frying, then i bring back the oil temperature to high and refry all the yck until golden brown.

I will leave in a 250 f oven for 5 - 10 minutes to further crisp and loose some oil.

Serves
Read More......

Tuesday, March 28, 2006

Kuih Koci

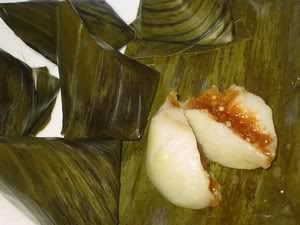
Since i found the utensil to scrape fresh coconut, i am now able to make kuih kuih which are very near to the ones sold in Malaysia. Have not eaten one for donkey ages. I am sure it was the same with my friends who attended the potluck in my house last sunday. I made the kuih koci ahead of time and i tasted one and it was the best, if only i had pulut hitam, it would be better. I left the rest in the freezer. On sunday morning, i steamed them and made the mistake of oversteaming, the santan turned to oil. so, a word of caution, do not oversteam. This recipe is for bigger kuih koci but i made them half the size which is so cute. This picture is taken from the first batch i made which does not have pandan paste added to the dough

Image hosting by Photobucket

Ingredients:

300 g glutinous rice flour
1 tbsp cornflour
1 tbsp sugar
1 tbsp oil
1 tsp pandan paste
270 - 300 ml coconut milk

For glazing
3/4 cup thick coconut milk
1 tsp rice flour mix with 1 tbsp water
1/2 tsp salt

16 pieces banana leaves (15 cm x 20 cm) softened in boiling water
oil for greasing the banana leaves

Filling

2 cups grated coconut
90 g gula melaka
50 g sugar
1 tbsp sago mixed with 2 tbsp water
2 tbsp water
1/2 tsp salt

Method:

Filling:

Cook gula melaka, sugar and water until syrupy.

Add grated coconut and sago and cook until sago is cooked and coconut is dry.

Leave to cool and divide into 16 pieces.

Dough

Mix glutinous flour with cornflour in a large bowl.

Bring coconut milk, sugar and oil to the boil, remove from heat and add pandan paste then pour over the flour.

Use a wooden spoon and mix into a dough. Knead until smooth.

Divide dough into 16 pieces and rest dough covered with a damp cloth.

Cook the 3/4 cup of thick coconut milk and salt in the microwave on high for 1 minute and then mix in the rice flour. Stir to mix and put back in the microwave and cook 1 more minute until mixture is thickened. (timing depends on your wattage of microwave)

Take a piece of dough, flatten and plsce a part of the filling in the middle, wrap up filling. Make sure to cover filling thoroughly. Dunk into coconut milk glaze and coat generously.

Put in the middle of greased banana leaves and turn ends in.

Repeat with the rest and steam in boiling water for only 12 - 15 minutes.

Kuih koci should be served warm but if you are in the tropics it can be served in room temperature.
Read More......

Wednesday, March 22, 2006

Renee's Birthday Cakes

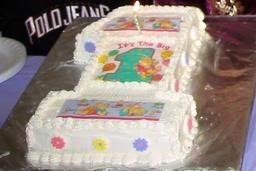
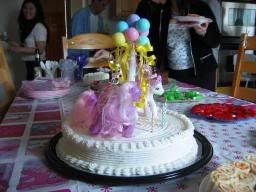
How time flies, it was like yesterday that i made Renee's baby shower cake and now she is four. The earlier cakes are made before my blogging days so the pictures are the best that i can get from her album.


Image hosting by Photobucket
One Year Old - The design is a cut out from the goodie bag.
Image hosting by Photobucket
Two Year Old - Hello Kitty is outlined with melted chocolate and filled with homemade piping jelly.
Image hosting by Photobucket
Three Year Old - My Little Pony figurines were borrowed from Renee's collection.
Image hosting by Photobucket
Four Year Old - Strawberry Shortcake


STRAWBERRY SHORTCAKE BIRTHDAY CAKE

Ingredients:

3 cups : all purpose flour
4 1/2 tsp : baking powder
1 1/2 tsp : salt
10 - egg yolks
3/4 cup : oil
3/4 cup : chopped frozen strawberry
1 1/4 cups : sugar
1 cup water


10 - egg whites
1 cup : sugar
1/2 tsp : cream of tartar


Method:

Pre heat the oven to 160c/350 f(convection).

Sieve the cake flour, baking powder and salt.

In a bowl, combine the egg yolks, sugar, oil, strawberry and water. Whisk lightly, then add the flour to the egg yolk mixture. Mix until the batter is smooth. Set aside.

Whisk the egg whites lightly and add in the cream of tartar and sugar. Continue to whisk until the mixture is stiff. Do not overheat or allow the mixture to become dry. Set aside.

Gently fold half the beaten egg whites into the egg yolk mixture and blend well. Fold in the remaining egg whites and work very lightly with a spatula. Make sure the mixture is well mixed.

Place the finished mixture in an ungreased 12" cake pan (i lined with aluminium foil so that the cake can be removed by lifting out the foil and then tear away). Level and bake in the oven until golden brown (about 45 minutes).

Remove the cake from the oven and invert the mould. Allow it to cool for 1 hour. Do not remove the pan while the cake is still hot.

Ice the cake with buttercream icing:

2 cups Crisco Shortening
1 stick (8 tablespoons) butter , slightly soft but not mushy
1/4 to 1/2 cup heavy whipping cream
2 tsp. clear vanilla
2 pounds (8 cups) powdered sugar, sifted (measure, then sift)

Method:

In your mixer bowl, beat the shortening until it's smooth, add the butter and beat together until smooth and light and fluffy.

Add smaller amount of the heavy cream indicated in the recipe and the vanilla and mix well.

Add half the powdered sugar and mix for 5 minutes on low-med. speed.

Add remaining sugar and mix well.

Add more cream or powdered sugar if necessary to adjust the consistency.

Serves
Read More......

Friday, March 10, 2006

White Pork Slices With Garlic Sauce

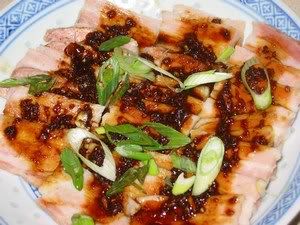
This is a simple and delicious dish for pork lvoers. The belly pork in this recipe is streaked with fat, but boiling reduces the fat considerably. If belly pork is too fatty for your liking, you can use shoulder pork but it has to be rolled up first. The meat should have a slight crunch to it - a little surprise for a boiled meat dish - and be very thinly sliced. The garlic sauce is pungent and tasty and typically Asian in style.

Image hosting by Photobucket

Ingredients:

1 lb belly pork
1 tbsp salt
1 large slice ginger
2 spring onions

Garlic sauce:

2 tbsp chopped garlic
2 1/2 tbsp sweet dark soy sauce
1 tbsp white chicken stock
1 tsp chilli oil

Method:

Cut the skin away from the prok.

Bring 2 litres of water to the boil. Blanch the pork in the boiling water then refresh in cold water.

Change the water, bring to the boil, add salt, ginger and spring onions.

Add the pork again and remove any scum that floats to the top.

Turn flame to a simmer and cook for 30 minutes.

Remove pork from the water dan insert a skewer into the meat. Check the fluid that runs out - it should be clear without any trace of blood.

When pork is done, remove it from the pot and allow to stand for 30 minutes.

Slice it into very thin slices and arrange on a serving plate.

Bring the stock back to the boil and ladle over the pork slices. (The last step ensures that the pork is completely cooked. If the meat is still pink after one ladle of stock, repeat the process)

Drain the stock off the plate before serving.

For garlic sauce, mix the ingredients together thoroughly.

Pour the sauce over the pork slices.

Garnish with chopped spring onions/coriander.

Serves
Read More......

Sunday, March 05, 2006

Pandan Chiffon Cake

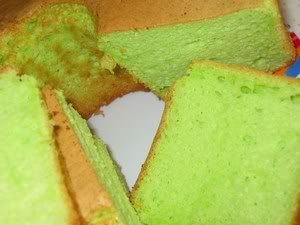
This recipe from Chef Bernard Decaix is different as he does not have oil but 300 ml of the coconut milk required is enough to moist the cake. As usual, i do not use pandan leave juice but use 1 tsp pandan paste instead. I omitted pandan juice not by choice and i found that without it, the fragrance from the paste did not play second fiddle.

Image hosting by Photobucket

Ingredients:

150 g : cake flour
0.5 tsp : baking powder
0.25 tsp : salt
8 - : egg yolks
300 ml : coconut milk
2 tbsp : pandan juice
160 g : castor sugar
0.5 tsp : pandan essence
9 - : egg whites
1 tbsp : castor sugar
0.5 tsp : cream of tartar


Method:

Preparation Batter

Pre heat the oven to 180c/350 f(convection).

Pour the coconut milk into a saucepan and add the castor sugar. Bring to a boil, stirring slowly to disslove the sugar. set aside to cool.


Sieve the cake flour, baking powder and salt.

In a bowl, combine the egg yolks, coconut mixture, pandan juice and pandan essence.

Whisk lightly, then add the flour to the egg yolk mixture. Mix until the batter is smooth. Set aside.

Whisk the egg whites lightly and add in the cream of tartar and castor sugar. Continue to whisk until the mixture is stiff. Do not overheat or allow the mixture to become dry. Set aside.

Baking the cake

Gently fold half the beaten egg whites into the egg yolk mixture and blend well.

Fold in the remaining egg whites and work very lightly with a spatula. Make sure the mixture is well mixed.

Place the finished mixture in an ungreased 10 inch chiffon cake /tube mould. Level and bake in the oven until golden brown (about 45 minutes).

Remove the cake from the oven and invert the mould. Allow it to cool for 1 hour.

Do not remove the mould while the cake is still hot.

When it has cooled, use a long, fine palatte knife to loosen the sides of the cake to remove it from the tin.

Serves
Read More......

Saturday, March 04, 2006

Black Forest Cake

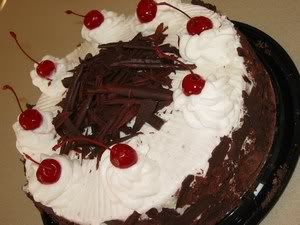
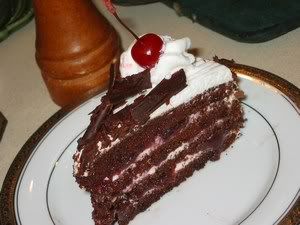
In the old tradition, chocolate chiffon soaked with kirshwasser and filled with black bing cherries and whipped cream and now it has be adulterated by adding the kirsch into simple syrup. It is a very delicious change and a very popular cake for any celebration. This year i baked it for Jeremie's birthday.

Image hosting by Photobucket Image hosting by Photobucket

Ingredients:

(A)

4 egg yolks
40g sugar
1/4 tsp salt


(B)

85ml corn oil warmed
25g cocoa powder

(C)

135ml warm water

(D)

125g cake flour
1/2 tsp baking soda
1/2 tsp baking powder

(E)

4 egg whites
1/2 tsp cream of tartar
50g sugar


Simple syrup plus 1 tbsp Kirsch

Filling

8 marachino cherries with stems
15 oz can pitted sour cherries halved
1 tbsp cornflour plus 2 tbsp water
400ml whipping cream whipped with 2 tbsp icing sugar
80g shaved Dark Chocolate

Method:

1. Mix ingredients (A) well with a hand whisk.

2. Stir cocoa powder in warmed oil until dissolved and pour into yolk mixture.

3. Stir (C) into yolk mixture.

4. Sieve ingredient (D) and stir it into yolk mixture.

5. Whip egg whites in a clean mixing bowl until big bubbles are formed. Add in the cream of tartar and whip and add in sugar in 3 portions while whipping the whites. Whip until stiff peaks formed.

6. Pour 1/3 white into yolk mixture and blend well.

7. Pour yolk mixture into the remaining egg white mixture and blend well.

8. Pour batter into ungreased 9 inch baking pan and bake at 350 f for 45 minutes or until cooked.

9. Invert cake and leave to cool. Then cut cooled cake into 3 layers.

10. Whip the cream with icing sugar until stiffand leave in the fridge.

11. While cake is baking, prepare the filling.

a. Strain juice of pitted cherries into saucepan.
b. Bring juice to the boil and thicken with cornflour mixture.
c. Bring back to the boil and cook for 1 minute. remove from heat and let cool.
d. Add in the halved pitted cherries.

11. To assemble cake:

a. Slice cooled cake into 4 thin slices.
b. Place one slice of cake on a cake base and brush generously the simple syrup all over the surface.
c. Cover cake with whipped cream and then 1/3 of the filling.
d. Top with another slice of cake and repeat process , simple syrup, cream and filling.
e. Iced the whole assembled cake with whipped cream and decorate with shaved chocolate and marachino cherries.


Serves
Read More......
Related Posts Plugin for WordPress, Blogger...